To add a Cookie Consent Banner to your website, go to:
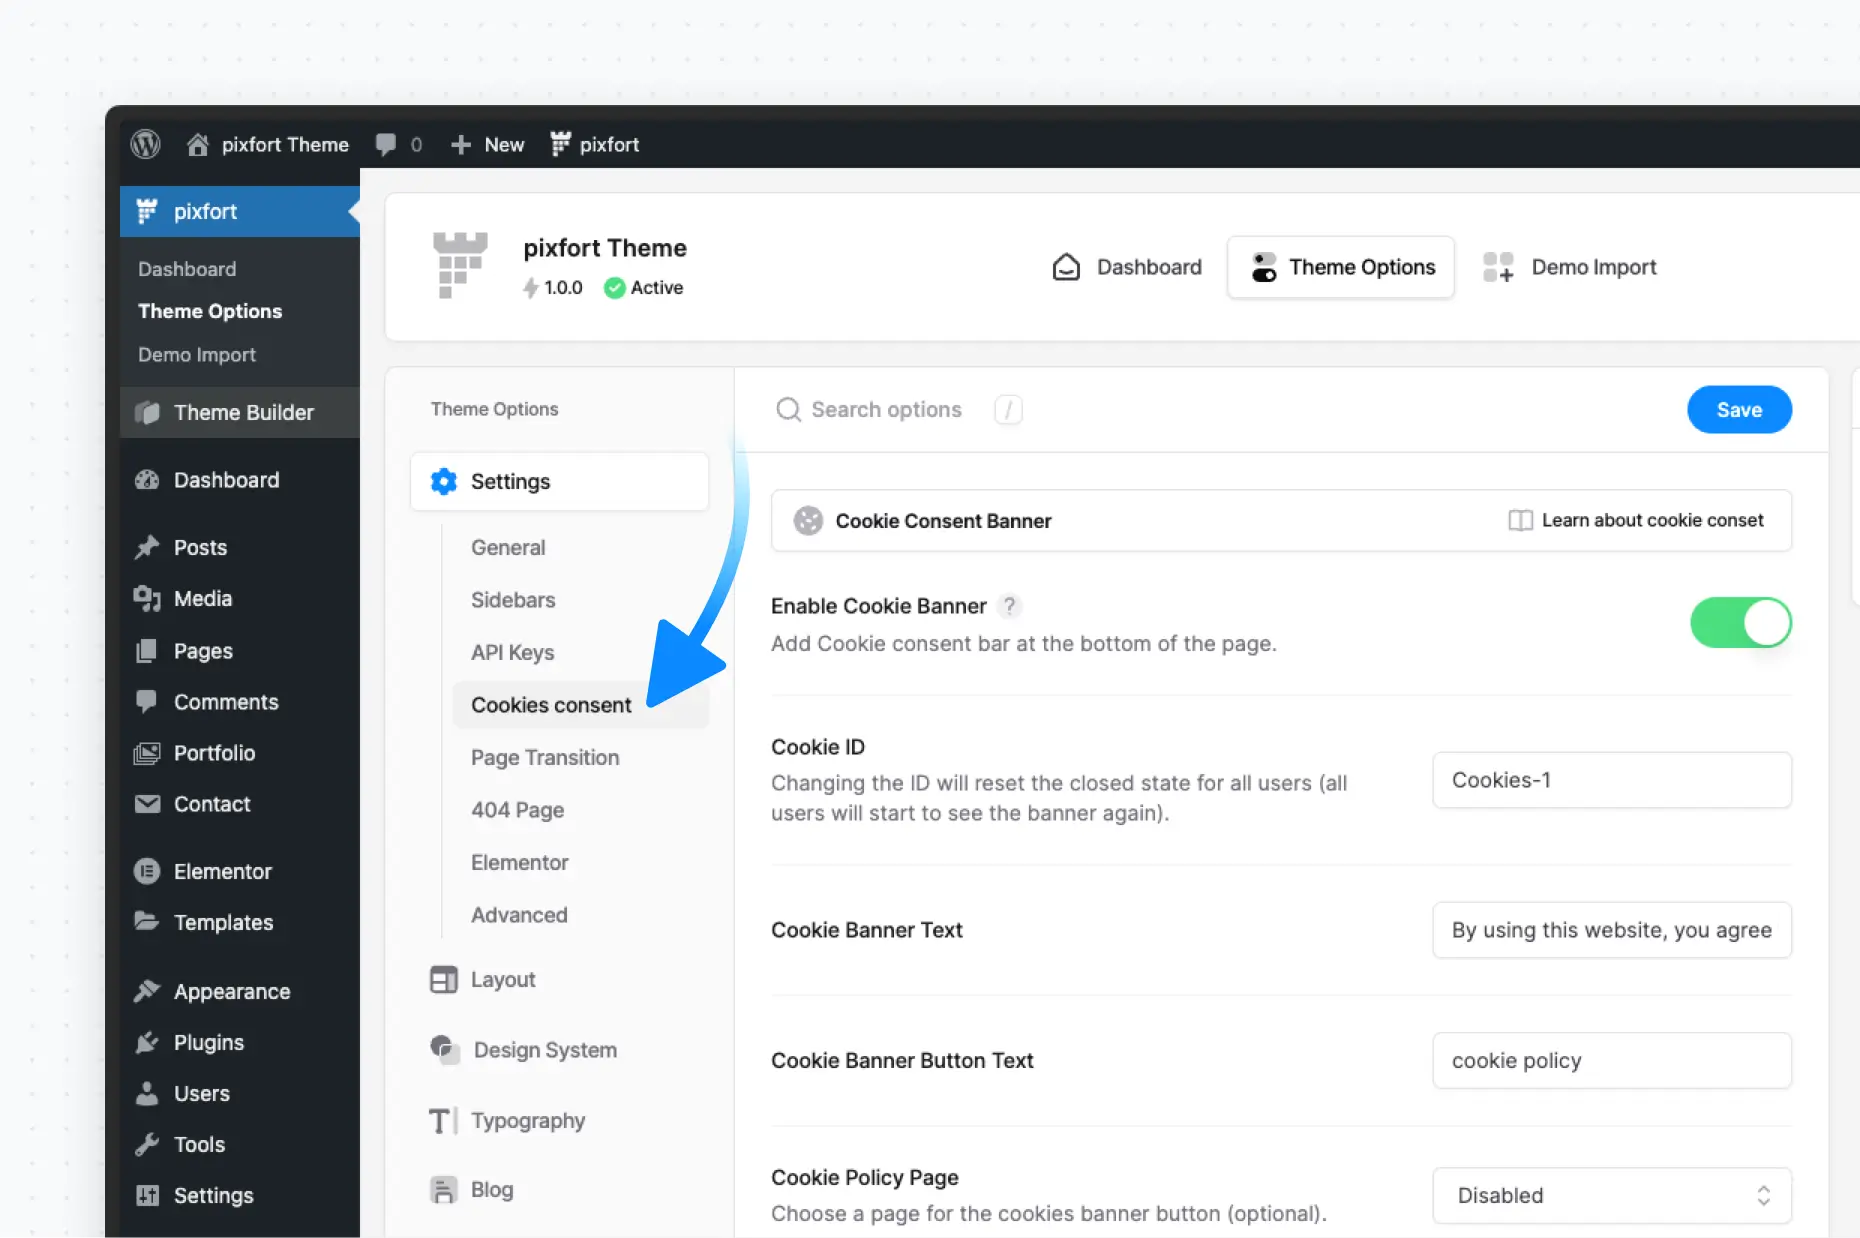
Theme Options > Settings > Cookie Consent
Theme Options > Settings > Cookie Consent
In this tab, you can configure the following options:
- Banner ID – Used to manage when the banner should reappear
- Banner Text – Customizable consent message
- Button Link – Either a normal URL or open a popup
- Cookie Image – Customize the default image shown in the banner
Show a Cookie Policy in a Popup
If you choose the “Open a Popup” option for the button link, you can customize the content of the selected popup via Elementor page builder from:
Theme Builder > Popups > Edit Your Popup
Re-enable the Cookie Banner for All Users
If you’ve previously accepted cookies (i.e., closed the banner), it won’t show again. To force the banner to reappear for all users:
- Go to Theme Options > Settings > Cookie Consent
- Change the Cookie ID to a new unique value (e.g., Cookie-2)
- Save the changes
This will reset the consent and display the banner again.
Important Notes
- The built-in cookie consent banner only displays a basic consent message with a link to your cookie policy page.
- It does not include advanced cookie/GDPR management features like script blocking or preference settings.
If you need full GDPR compliance with advanced controls, we recommend using a third-party plugin that fits your needs.
Customize the Cookie Banner Design
Change Banner Background Color
To change the banner background, add this code in:
Theme Options > Layout > Advanced > Custom CSS
.pix-cookie-inner.bg-white {
    background-color: #efe9e5 !important;
}
You can replace background-color with any custom color value.
Change Banner Text Color
To customize the banner text color, use:
.pix-cookie-inner span,
.pix-cookie-inner span:hover {
    color: #aca095 !important;
}
You can replace color with any custom color value.
Change Banner Button Text Color
To customize the banner button text color, use:
.pix-cookie-inner span a,
.pix-cookie-inner span a:hover {
    color: #543729 !important;
}
You can replace color with any custom color value.
Create a Custom Cookie Banner
If you’re looking to create a custom cookie banner with your own content, design, and behavior, you can do so by creating a popup and adding the relevant cookie consent elements along with any custom text or buttons you need. Once created, your cookie banner can be set to automatically show on page load or be triggered based on user interaction.
For detailed steps on how to create and customize popups, you can refer to this article:
You can also explore some great examples of premade cookie consent banners available for import by visiting the Popup Builder preview page:
https://core.pixfort.com/popup-builder